Trade-bot building
Creating your first trade-bot
In this small tutorial, we're going to show you how you can create a very basic trade bot.
Step 1: Creating a trade-bot
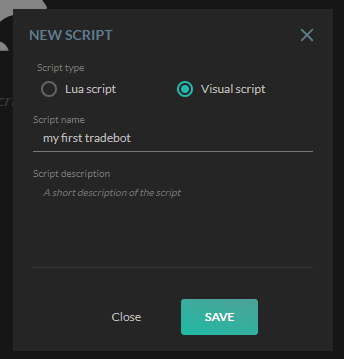
To create a trade bot, you need to go to the left menu and select the "Web-editor". Once selected, a new page will show up. On top of this page you'll find a toolbar - click on the leftmost icon to create a new script. If all goes well, you'll see a window on your screen asking you what sort of script you want to create. Select a visual script and give the trade-bot a name.
Step 2: Add an easy indicator
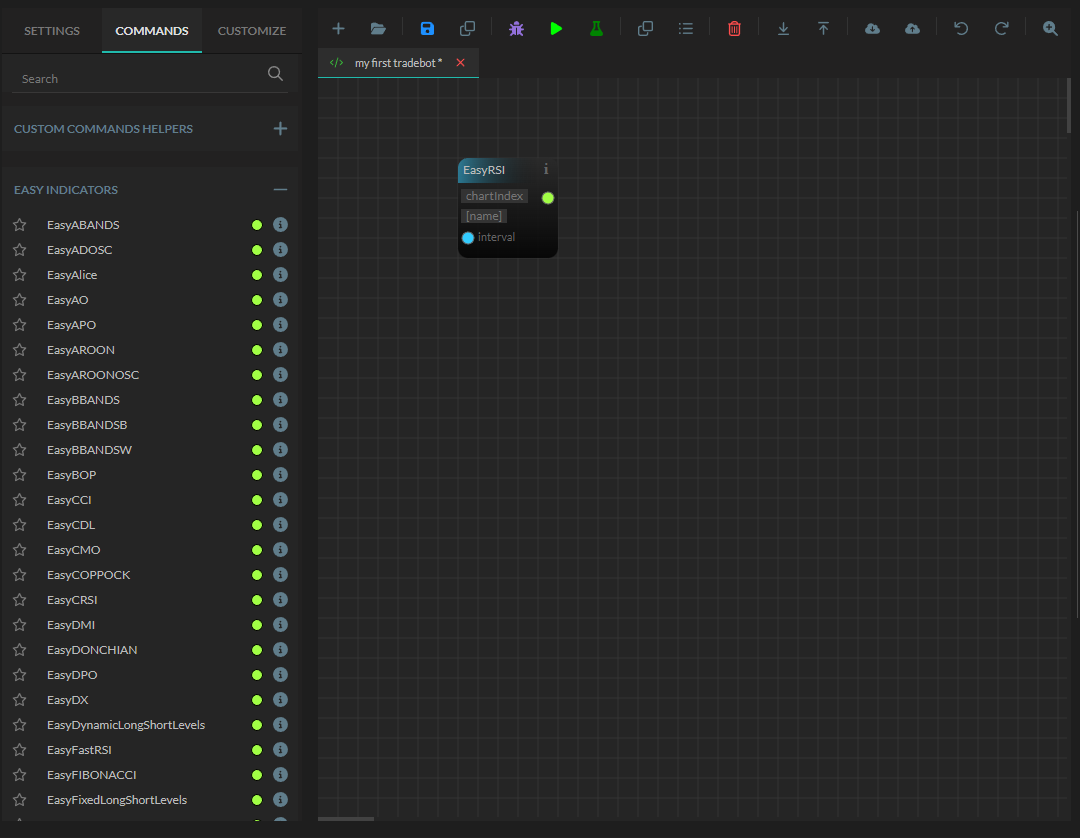
Go to the left and select the "Commands" tab. In the commands tab, scroll down until you see the "Easy indicators". Click on it to open the pane. Once open, click on, for example, the RSI easy indicator and add it to your drawing panel.
Step 3: Setup the Easy Indicator
When you add an easy indicator, you will see a few fields which requires your input. In the context of an easy RSI indicator, you will see the fields "chartIndex" and optionally the "name".
Chart index 0 is used for the price candles and we want to display the RSI below it, let's set up chart number 1 here. This will show the RSI chart below the price chart.
The "name" field is optional, however, let's give it the name "RSI".
When you have these fields set up, click on the "Run" button in the toolbar. If everything is configured properly, you'll see the RSI chart displayed.

Step 4: Connecting the dots
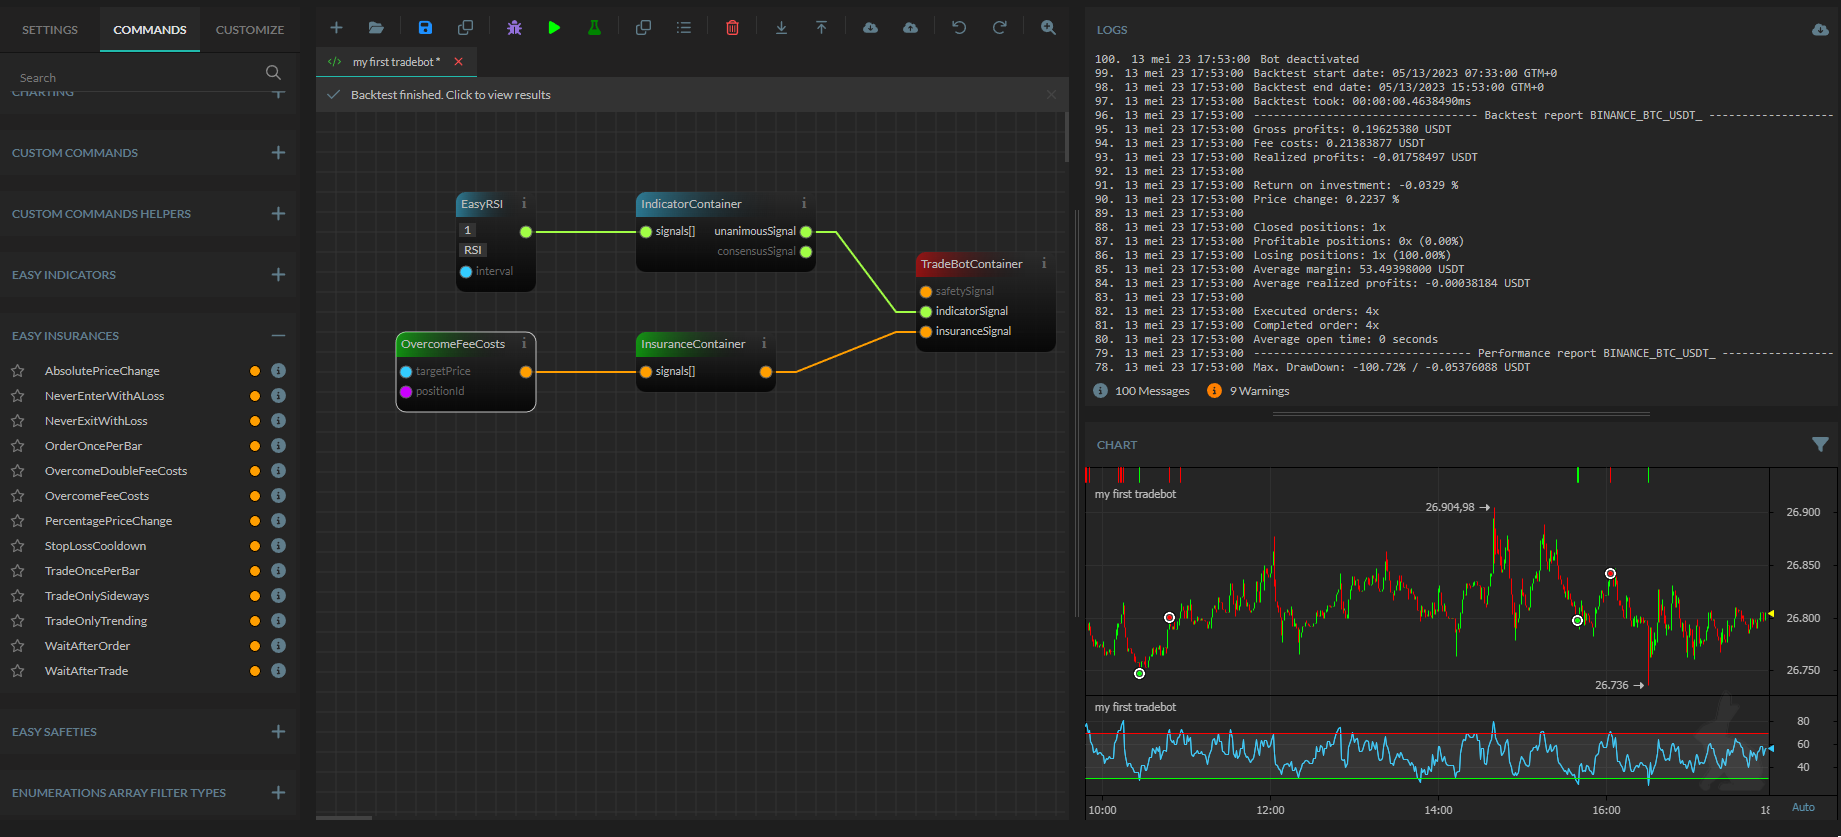
Just adding the easy indicator, are just the first steps. The next step is to create the tradebot itself. Go to the "Commands" tab again and scroll down till you see the "Trade Bot" pane and click on it to open it. Select the "IndicatorContainer" and add it to your drawing. Do the same for the "TradeBotContainer".
Once you have the "RSI", "IndicatorContainer", and the "TradeBotContainer" all properly added, you need to start connecting the dots.
Go to your RSI Easy Indicator and click on the green dot, draw a line to your "IndicatorContainer" and connect it to the "Signals".
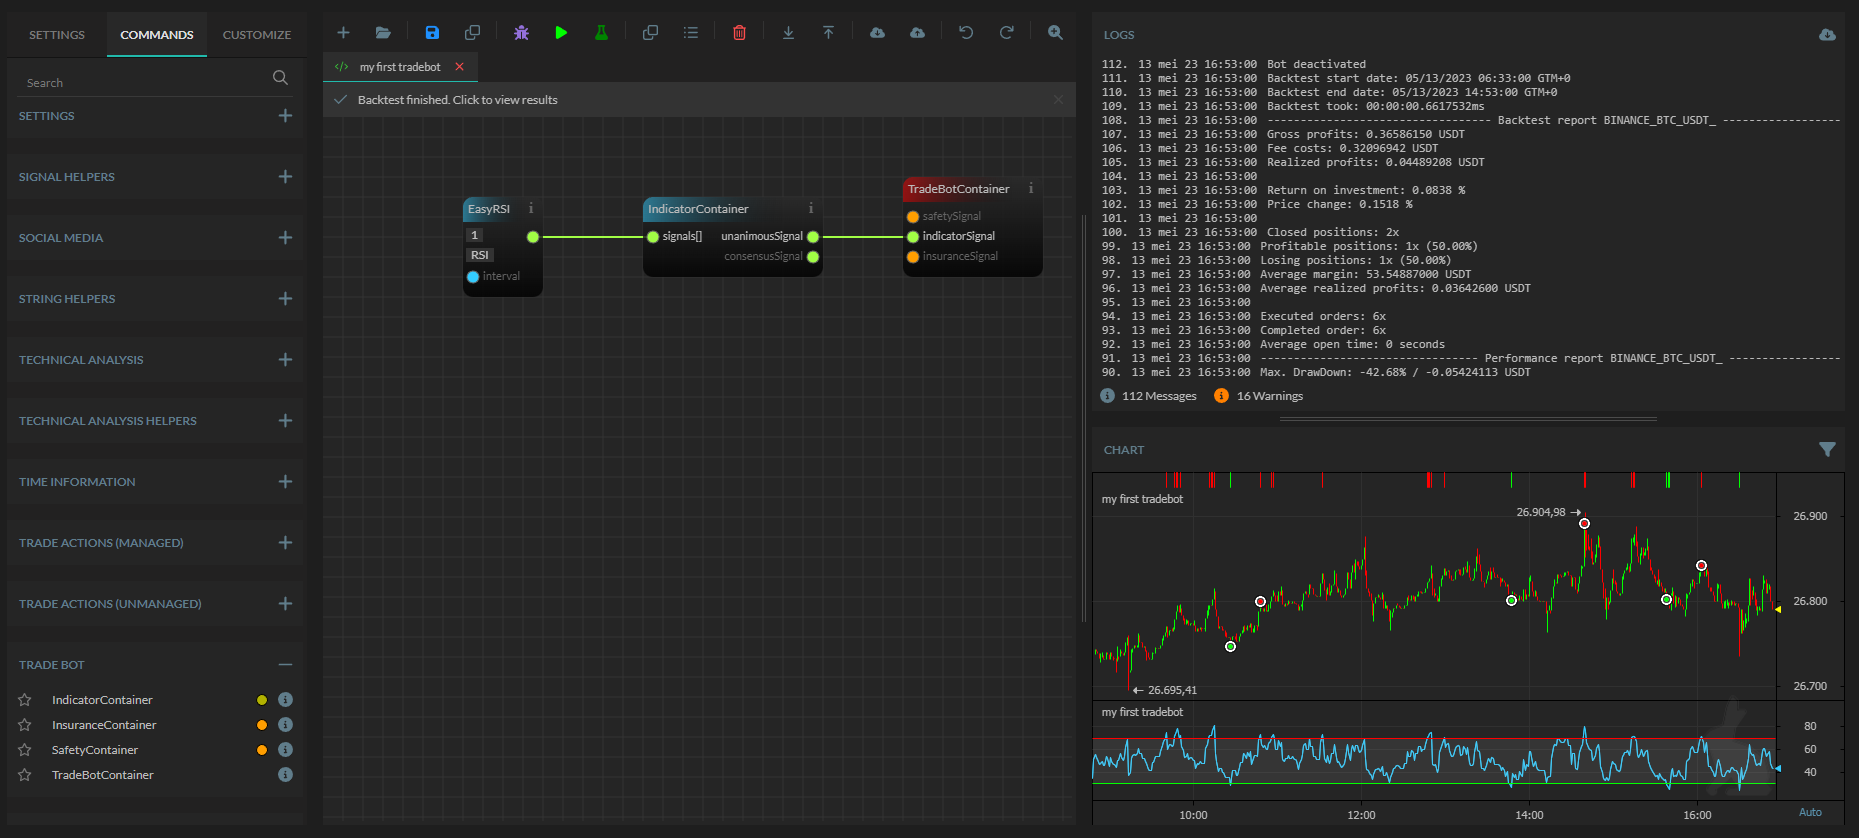
Go to your "IndicatorContainer", select the green dot saying "unanimousSignal" and draw a line to your "TradeBotContainer", connect your line to the "indicatorSignal" in the "TradeBotContainer".
Once you have made connections, click on the Run button in the toolbar again and look at the chart which has been generated. If all went well then you will see buying and selling moments shown on your chart now. Congratulations, you have made your first tradebot now!
Easy Indicator Settings
Each time you add an easy indicator, the input fields will be added as well. For example, if the Easy Indicator RSI is added, the setting fields "Period Length", "Buy Level", and "Sell Level" get added. You can see the script's settings if you open the left tab named "Settings".

Adding more easy indicators
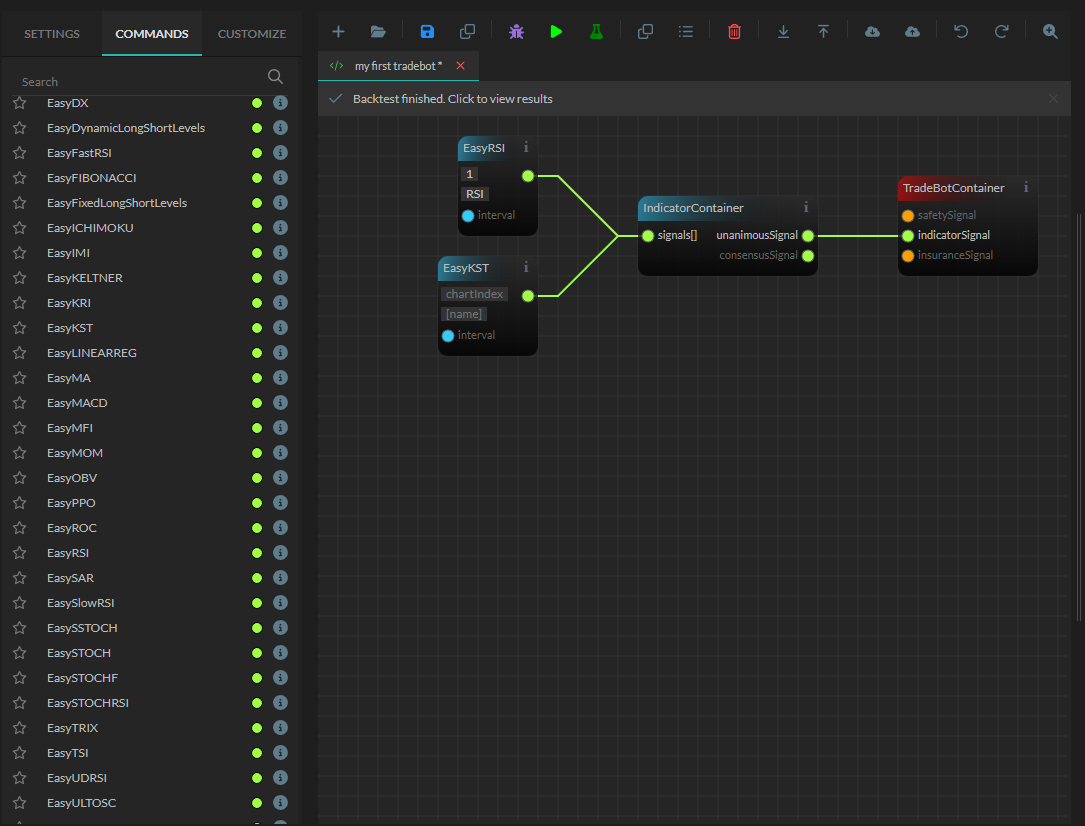
You can decide to add more easy indicators. If you want to do so then go to the "Commands" tab, scroll till you see the "Easy Indicators", and select the indicator you want to add. Add it, and connect the green dot of it to the "IndicatorContainer".
Adding insurances
You can add Easy Insurances to a trade-bot to have a way to check the indicator signals. For example, suppose you never want to sell at a loss. Always overcoming the fee costs. Then you need to go to the "Commands" tab and open the "Easy Insurances" pane. Select the "OvercomeFeeCosts" and add this to your drawing. Go to the "Trade Pane" and add a "InsuranceContainer". Connect the orange dot of the "OvercomeFeeCosts" to the "InsuranceContainer" and connect the "InsuranceContainer" again to the "insuranceSignal" in the "TradeBotContainer".
Once added the insurance will check the indicator signal and approve the trade of the indicator or dismiss the signals. Again, easy insurances check the easy indicator signals.
Adding safeties
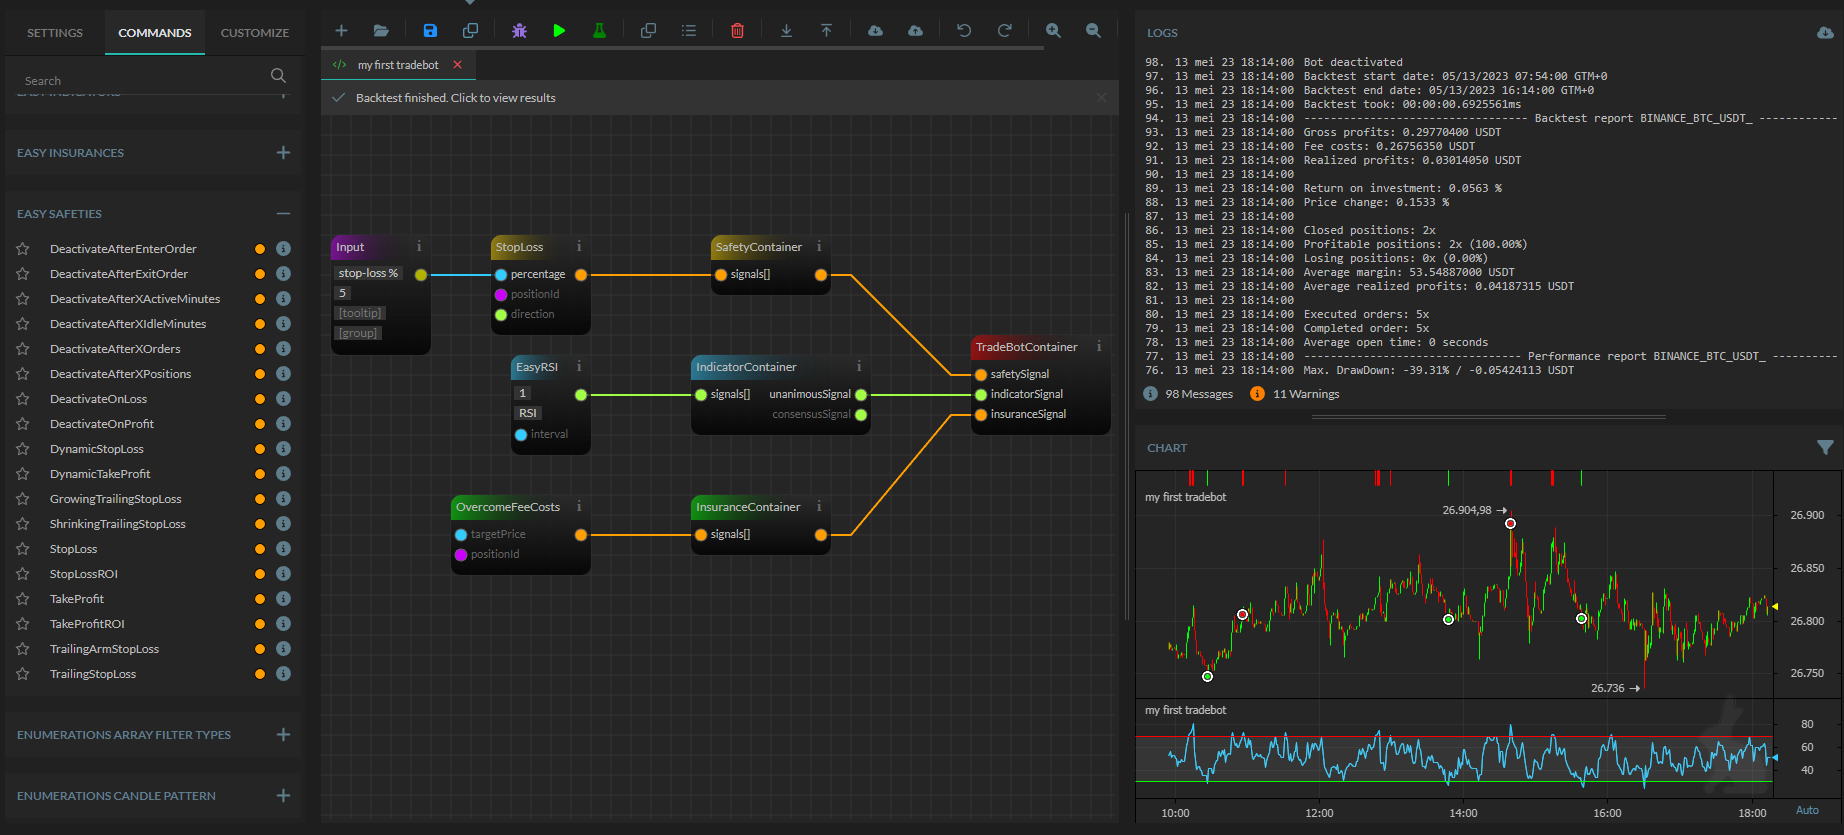
You can add Easy Safeties to a trade-bot to have a way signal to something in the worst-case situation. With easy safeties you need to think about a stoploss. To add a safety like a stop-loss you need to go to the "Commands" tab and open the "Easy Safeties" pane. Select the "StopLoss" and add this to your drawing. Go to the "Trade Pane" and add a "SafetyContainer". Connect the orange dot of the "StopLoss" to the "SafetyContainer" and connect the "SafetyContainer" again to the "safetySignal" in the "TradeBotContainer".
To make the "StopLoss" easy safety work, we need to make 1 extra step. This safety requires us to give a "percentage". To make that work, we need to add an input field for it. To do so, you need to go to the "Commands" tab and open the "Input fields" pane. Select "Input" and add this to the drawing. Connect the ugly green dot of this input field to the blue percentage dot of the StopLoss. And, set up the input field with a "name" and "default value".
Once added the safety will use your bot's details and execute their checks. If needed, they will produce trade signals which the trade-bot will execute directly. So this safety signal is NOT checked by the insurances and overrules the indicator's signals.
Notes
Creating trade-bots using this method makes it incredibly simple to build one. However, there may be cases where you need to create a bot that cannot be achieved through this process. In such instances, you'll need to adopt a different approach - one where you can create a more sophisticated bot on your own. This can be done by using visual bot building or by scripting a bot yourself.